Not every app is built for the wild. No Roads is.
Whether you’re planning your first trail ride or prepping for a weekend deep in the backcountry, No Roads was designed to help you explore with confidence—without overcomplicating the process. In this guide, we’ll walk you through exactly how to get started, from your first download to dropping your first waypoint.
Because when the road ends, your adventure begins.
Download the app and prepare to explore
No Roads is available on both iOS and Android, and the experience is identical across platforms. You can download it directly from the App Store or Google Play.
Once installed, you’re just a few taps away from your first off-road adventure.
Set up your account
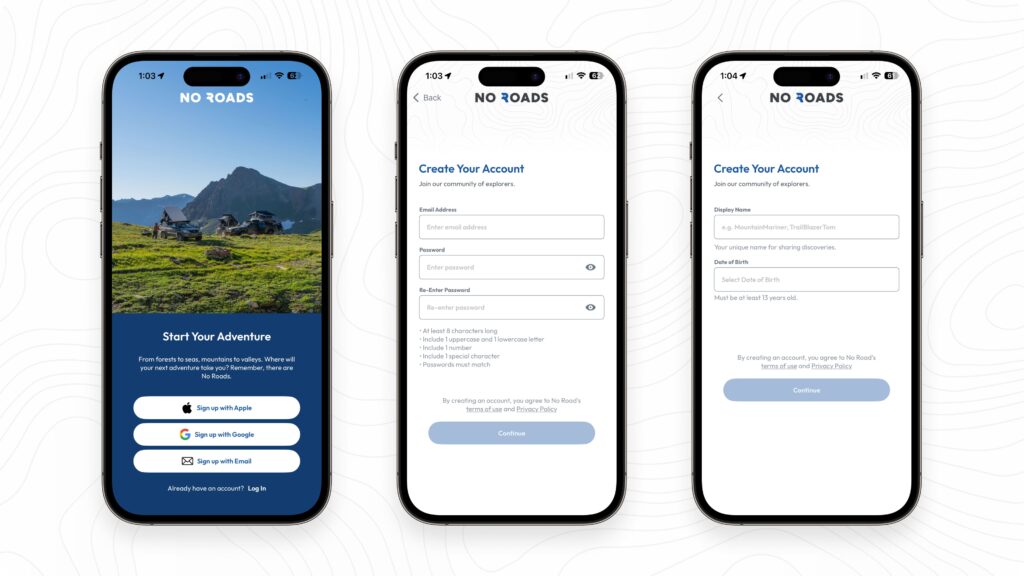
Creating an account only takes a moment. You can sign up using:
- Email and password
- Google single sign-on (iOS + Android)
- Apple sign-in (iOS only)
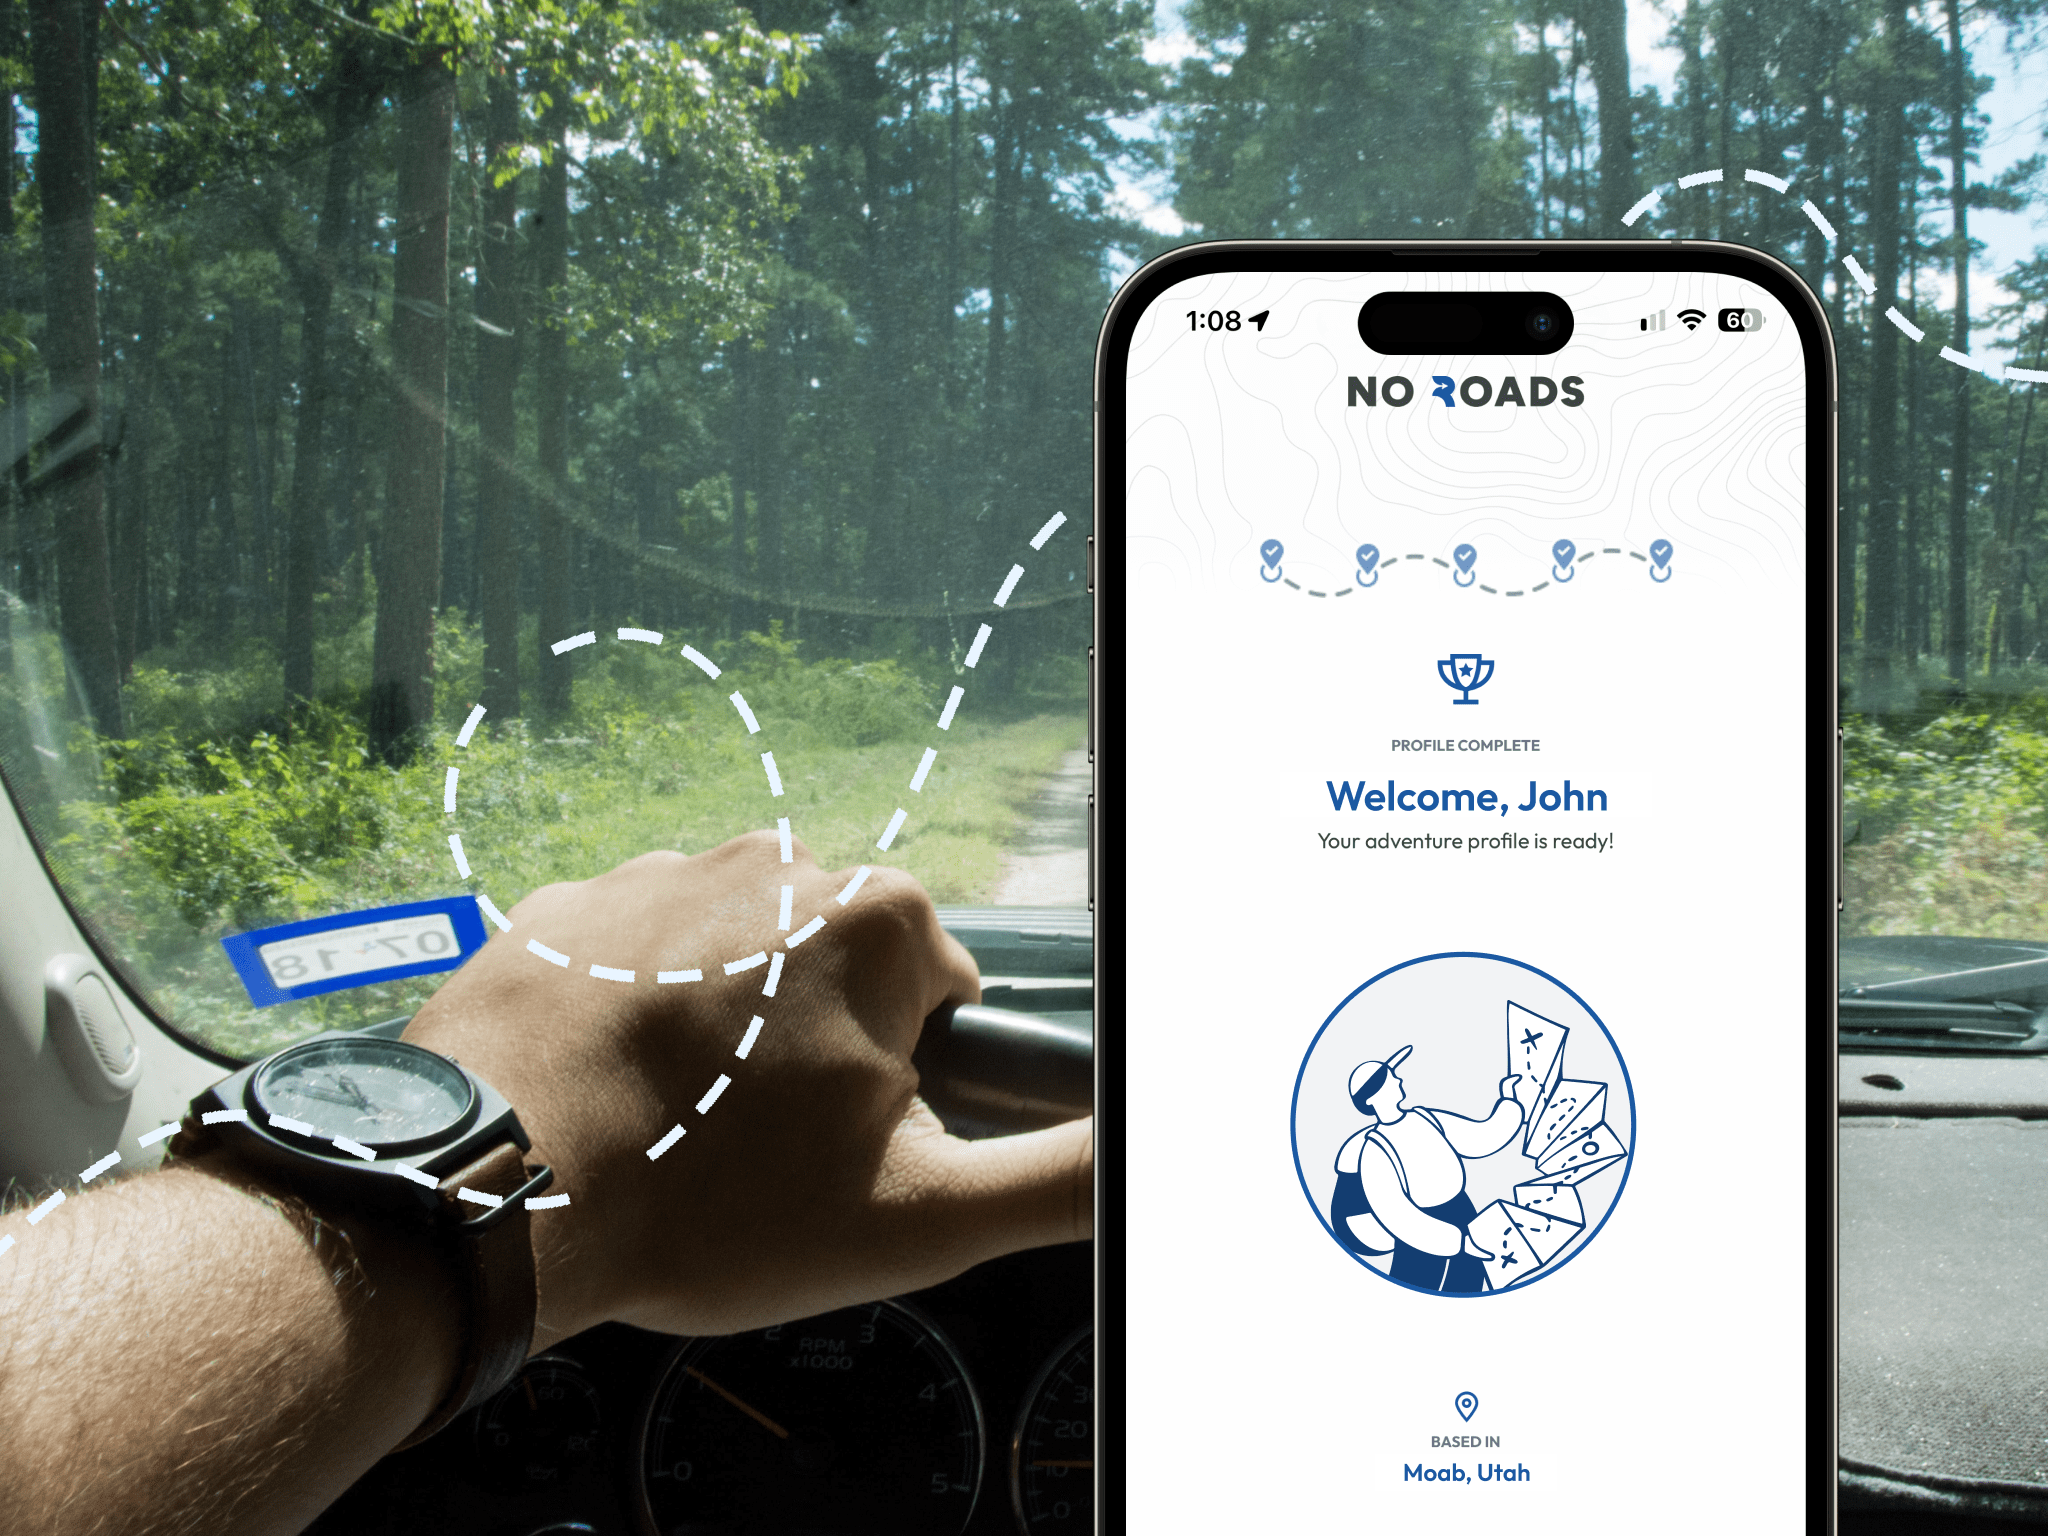
After signup, you’ll confirm your email address with a quick code we’ll send to your inbox, then choose a display name. This is the name your fellow explorers will see—make it memorable! Display names must be unique across the platform.
Need ideas for your display name?
Your name is your identity on the trail. Here are some ideas to get your wheels turning: Trail Blazer 27, Overland Olivia, Campfire Carl, Wyo Wanderer, 4×4 Nomad, Snow Tracks, PNW Explorer, River Roamer
Note: Display names must be unique.
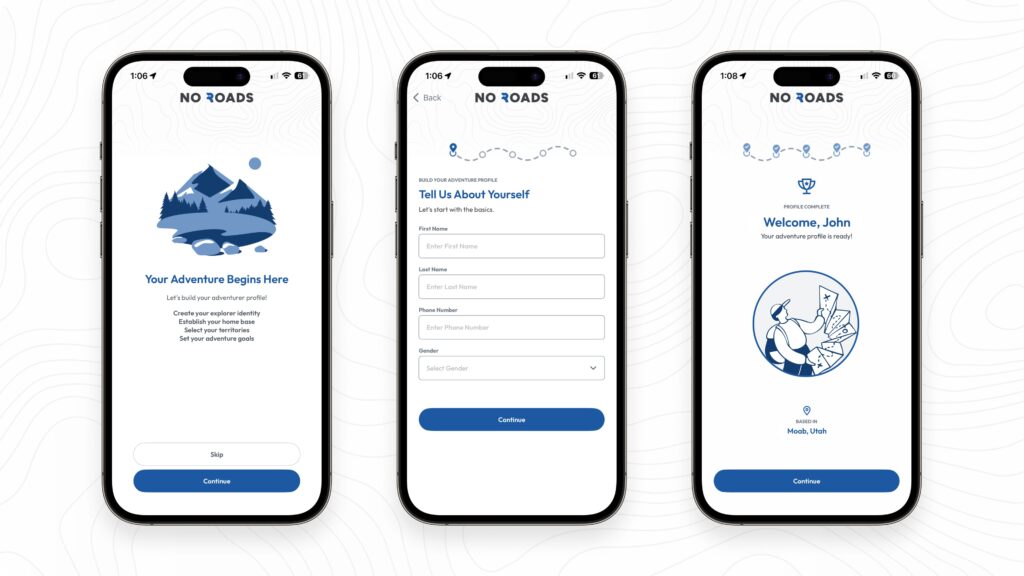
Once your display name is set, you can step through your Adventurer Profile or skip straight into the app. The profile includes five optional sections:
- Tell us about yourself: Add your name, phone number, and gender
- Add a profile photo: Upload an image to personalize your account
- Establish your base camp: Set your home address as your starting point
- Chart your territories: Select your interests (offroad trails, coastal waters, lakes & rivers, snow adventures)
- Set your compass: Choose your goals (discover new territories, navigate with confidence, connect with fellow explorers, plan better routes, track progress)
Don’t worry—these steps are completely optional and won’t limit what you can do in the app.
A quick tour of the No Roads interface
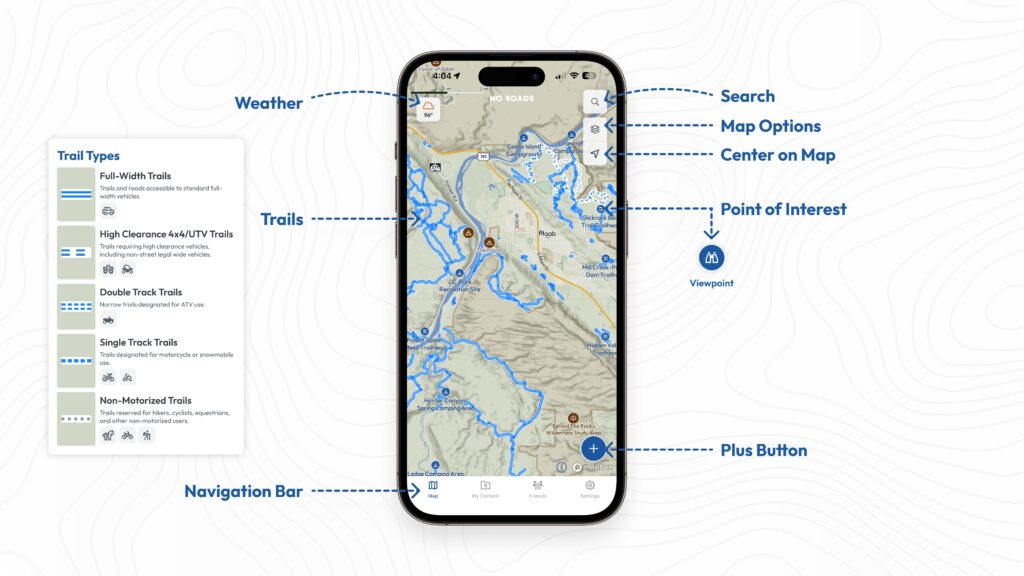
The app is designed to be intuitive and map-first. Here’s what you’ll see the moment you open it:
The map itself: As you explore the map, you’ll discover trails displayed as blue lines and points of interest as blue map pins. These represent thousands of detailed trails and notable locations like campsites and viewpoints across the United States, enhanced by community ratings, photos, and insights from fellow adventurers. If you see a trail or POI profile that’s empty, go ahead and leave a rating and add a photo or video!
Top of screen:
- Top left: Current map weather for the area displayed on your screen
- Top right: Search, map options (choose map style and layers), and location arrow to center yourself on the map
Plus button (lower right): This is your adventure command center for recording a track, dropping a waypoint, reporting a hazard, or saving an offline map.
Bottom navigation bar:
- Map – Your current view
- My Content – Home for all your saved and created items, plus collections
- Friends – View and connect with other adventurers
- Settings – Account preferences, map downloads, support tools
Understanding My Content
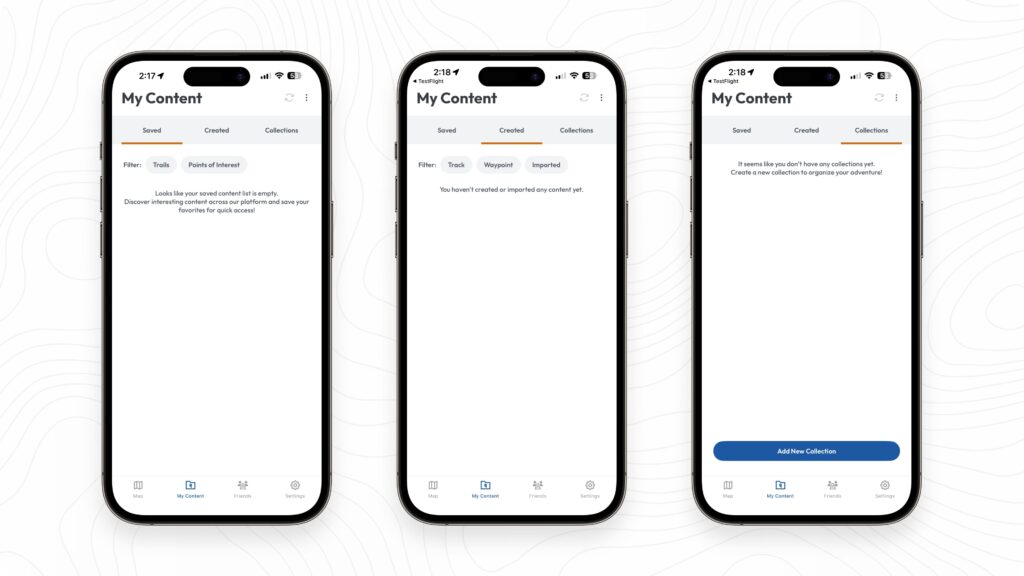
Your My Content section organizes everything into two main categories:
Created items: Content you’ve made yourself, like tracks you’ve recorded and waypoints you’ve dropped
Saved items: Trails and points of interest you’ve discovered and saved from the No Roads database
Both types can be organized into Collections—custom groups you create to keep related adventures together, like “Summer 2025 Trips” or “Favorite Campsites.”
Importing data: You can also bring in existing data from other mapping platforms by tapping the three dots in the upper right and selecting “Import.” No Roads currently supports GPX files with basic import functionality, making it easy to transfer your tracks and waypoints from other apps.
Try these first: Your launch checklist
Want to hit the ground running? Start with these actions:
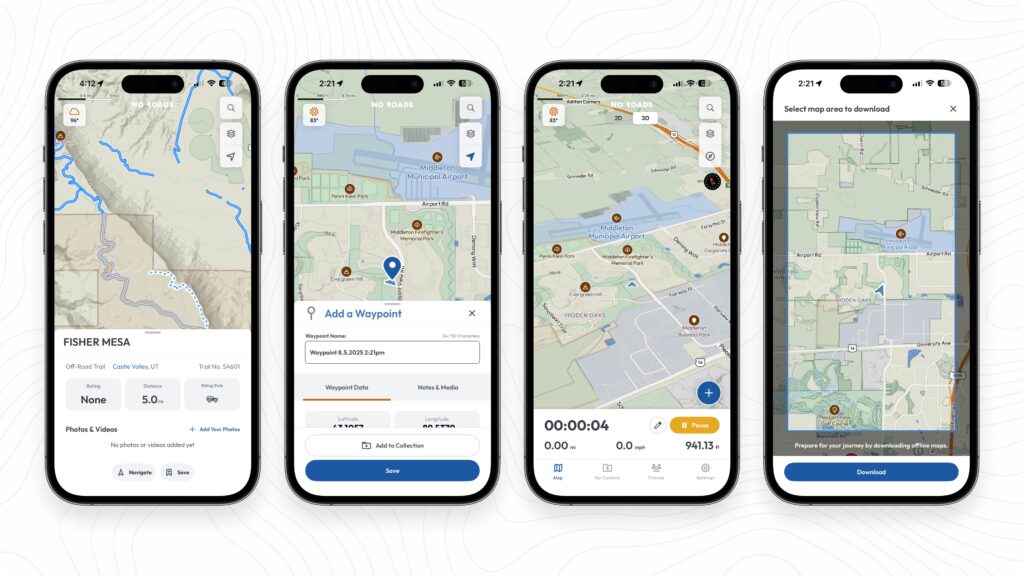
1. Explore a trail Tap on any blue line on the map to discover detailed trail information, including surface type, elevation data, and community ratings. This is where you’ll find your next adventure.
2. Drop your first waypoint Tap the plus button and select “Drop waypoint” to mark your campsite, a scenic overlook, or your trailhead. Choose from dozens of icons, customize the name, and group them into collections.
3. Record a track Tap the plus button and select “Record track” to capture your entire journey—speed, elevation, duration, and more. After your trip, you can name it, add notes, and attach photos.
4. Download an offline map Tap the plus button, then select “Save offline map.” You’ll be able to pan and zoom to select exactly the area you want to download. Once you’ve got your region selected, tap “Download” and the map will save to your device for offline use. Keep in mind that larger areas take longer to download, so plan accordingly.
Built for adventurers, designed for ease
No Roads isn’t a repurposed road app. It’s a trail-first mapping platform made for backcountry adventurers. The core features—trail maps, waypoint creation, track recording, and offline capability—are completely free.
For adventurers who want even more, No Roads+ adds premium features like real-time weather overlays, friend tracking on the map, and public land boundaries.
No steep learning curve. No buried menus. Just simple, intuitive tools designed to enhance your adventures, not complicate them.
Ready to explore?
Download No Roads on iOS or Android to get started. Already inside? Try dropping your first waypoint, or start recording your next trail. Every great adventure starts with a single tap.
Any terrain. Any adventure. No limits. No Roads.